Like most of the Midwest, we are anxiously waiting for Spring to arrive. It seems like we've been dealing with mud and snow and firewood forever. Finally, things really felt like spring this weekend.
Deer love strawberries. If there's one thing I've learned since starting homesteading is that deer love strawberries...the leaves, to be more exact. Last year it took me awhile to realize what was gobbling our strawberry plants--right down to the ground. Our crop really suffered until I got an electric fence up. Unfortunately, because I stopped running the fencer over winter, the deer got used to going over or through the fence. After adding another strand failed, I resorted to using some heavy chain link gates and corn crib panels, which seems to be doing the trick.
I also got the dead tops from the asparagus cut off, and a couple days later the new shoots came through. Here's some recent pics.
Monday, April 29, 2013
Thursday, April 4, 2013
I Kant do this anymore!
The move to the homestead has gone relatively smoothly, but it seems to have been the most challenging for our 3 year old, who says "I can't do this anymore" to absolutely everything that bothers him, whether it's his new bed, or picking up his clothes, or eating his lunch, etc. This is largely his age and temperament at work, but I'm sure the move has been hard for him because it's something new.
I studied philosophy in college, and it really wasn't until I was in lawschool and practicing as an attorney that I started to understand some of those things that made absolutely no sense to me in school. Oh if only I could go back and re-take some of those tests!
One of the philosophers I couldn't understand was Immanuel Kant, a German philosopher from the 1700s. But one nugget I think I understood was his ethical concept of universability, which basically says for an action to be moral, it must be possible for every person to permissibly perform the action.
One of the ideas that has driven me in my adult life, particularly the journey toward homesteading, is to seek a live that can be attained by many, not just an exclusive few. I've been blessed with a good education and the capacity to make lots of money. If I was more devoted to my profession as an attorney, I could buy a large farm, build a very nice house, drive new cars, and have many things that most people cannot afford. But that's not what interests me. Instead, I'm profoundly interested in finding a way to live that others can follow, whether they're attorneys or doctors or teachers or janitors.
While I can't say I've been perfect in applying this concept to our journey or our homestead, I think you'll find that most of what we do is fairly basic and straightforward. Our cabin is built with utility and efficiency as the primary goal, not appearance. We are a family of 7 (so far) in a small home by most standards, but a home that can easily be built by most anyone if they have the desire to work hard.
I hope that the things that we continue to do will prove helpful to others that feel the call to a homesteading way of life, irrespective of our respective vocational or financial situations. My dream for the future would be to see the landscape dotted with 3-5 acre homesteads, with modest houses, a functional set of outbuildings, large gardens, a small orchard, chickens in the yard, clothes on the line, and children in the yard.
Wednesday, March 20, 2013
Of stoves and cold
Unlike last year, winter refuses to give up. This morning it was around zero, and well below zero with windchill. What a difference a year makes!
It's actually a blessing that it's cold though, because now that I've insulated the floor, it's a challenge to keep the house COOL with the wood stove running. We're still shopping for gas ranges, so have to cook on the wood stove or crockpot. Hopefully we'll get the gas stove soon.
We also finished (actually my builder finished) the kitchen "cabinets" and I think they turned out real nice. As you can see, we have standard base cabinets, but included a beefy pine breakfast bar and heavy timber shelves rather than traditional wall cabinets.
It's actually a blessing that it's cold though, because now that I've insulated the floor, it's a challenge to keep the house COOL with the wood stove running. We're still shopping for gas ranges, so have to cook on the wood stove or crockpot. Hopefully we'll get the gas stove soon.
We also finished (actually my builder finished) the kitchen "cabinets" and I think they turned out real nice. As you can see, we have standard base cabinets, but included a beefy pine breakfast bar and heavy timber shelves rather than traditional wall cabinets.
Monday, March 11, 2013
Living the good life
I know it's been almost a month since my last post, so to bring you up to speed, we've officially moved in. However, that continues to be a work in progress, as was to be expected. As a large family trying to make the leap to a smaller place, we knew we wanted to take our time, so we could figure out what we really need and what we can live without. This process will continue over time as we carefully and honestly evaluate every article of clothing and every kitchen utensil.
So far, the kids love their new home, especially their bedroom. The wood feels so natural and peaceful. Looking out the windows in the early morning light to see our homestead is hard to explain. Heating and cooking with the wood cook stove is such a joy, but we're keeping our eyes open for a good LP gas range to use for cooking during the warmer months.
One thing I learned about our cabin is that you can't leave the floor uninsulated in the winter. I wrongly assumed that I could simply increase the heat of the cook stove and deal with cold floors until summer when it would be much nicer to crawl under the cabin. What I learned is that any spot where a piece of clothing or box or piece of furniture sat, the moisture would condense because of the cold floors and we'd have a wet spot. Not wanting to ruin the new floors, I decided I'd have to insulate. I considered using spray foam, but the cost was going to be 3 times the cost of fiberglass for about the same r-value. Plus, if I ever put in a basement, it would be much easier to pull out fiberglass than the foam. It was a horrible process of crawling around in the mud, but I got the floor insulated with r-25 fiberglass and then put 3/8" plywood under that. The cost was around $700 and well worth it.
I'll try to post more pics in the coming weeks, but here's a picture I took this morning after a fresh snowfall.
So far, the kids love their new home, especially their bedroom. The wood feels so natural and peaceful. Looking out the windows in the early morning light to see our homestead is hard to explain. Heating and cooking with the wood cook stove is such a joy, but we're keeping our eyes open for a good LP gas range to use for cooking during the warmer months.
One thing I learned about our cabin is that you can't leave the floor uninsulated in the winter. I wrongly assumed that I could simply increase the heat of the cook stove and deal with cold floors until summer when it would be much nicer to crawl under the cabin. What I learned is that any spot where a piece of clothing or box or piece of furniture sat, the moisture would condense because of the cold floors and we'd have a wet spot. Not wanting to ruin the new floors, I decided I'd have to insulate. I considered using spray foam, but the cost was going to be 3 times the cost of fiberglass for about the same r-value. Plus, if I ever put in a basement, it would be much easier to pull out fiberglass than the foam. It was a horrible process of crawling around in the mud, but I got the floor insulated with r-25 fiberglass and then put 3/8" plywood under that. The cost was around $700 and well worth it.
I'll try to post more pics in the coming weeks, but here's a picture I took this morning after a fresh snowfall.
Sunday, February 17, 2013
"Are you moved in yet?"
For the past 3 months, this is the typical first question I get every time I see someone at church, at the grocery store, or just around town. Whether easy small talk or genuine interest, this is exactly what happens. It's not unlike the 8 month pregnant woman who has endured 7 months of "how are you feeling" or "you're almost there." At some point you just want to be able to say--"yes, we're moved in". We are now VERY close, and have moved some of our furniture in to the new place, but alas we are not officially "living" there yet until I get the final inspection.
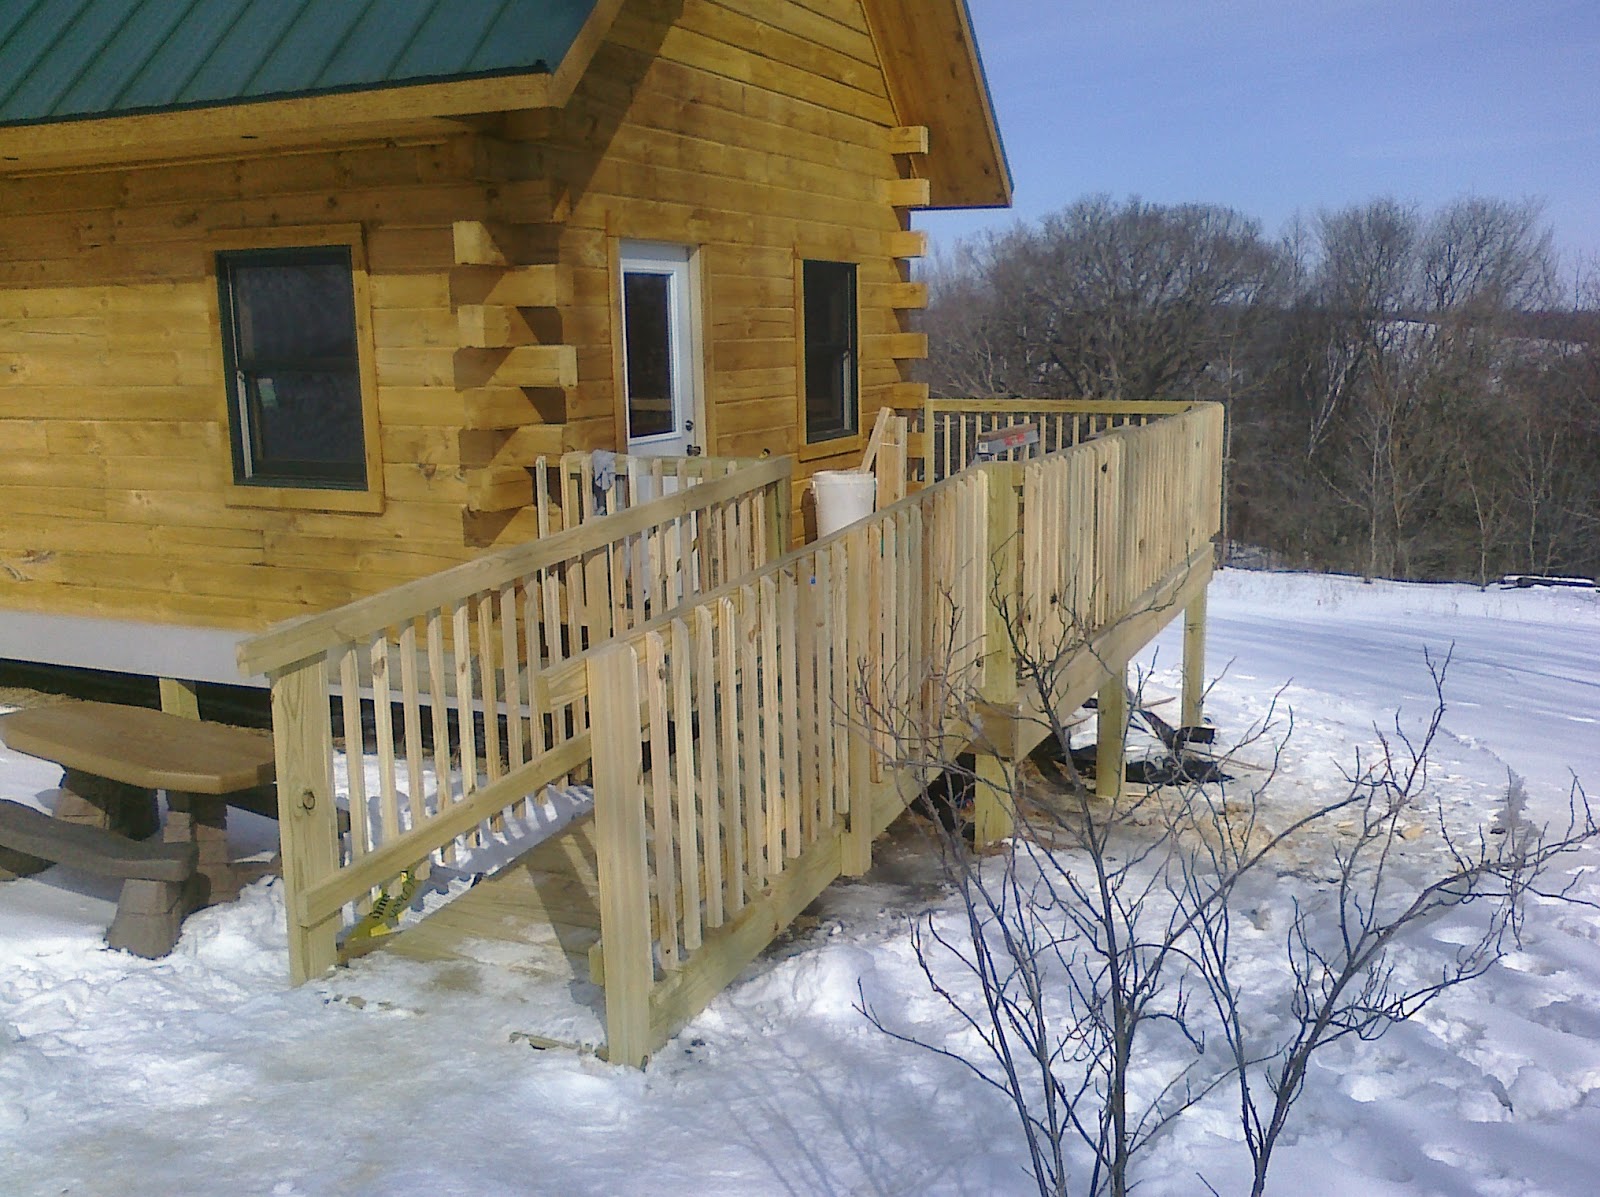
Even on a relatively modest project such as this, without running water or a central ventilation system, there are innumerable codes and rules that must be followed (a/k/a hoops to jump through). Overall this has not been a big hurdle, but now as I prepare for the final inspection, I'm trying to make sure I have everything ready to go. Deck railings have to be finished and there are very rigid rules on spacing between railing spindles, etc. The interior stairs are now basically done, with the exception of a few more coats of sealer and probably a hand rail at some point. There are also a few odds and ends trim pieces to put up.
The one exterior deck is now complete and, once I complete the spindles for the other side, I should be ready to have the inspector come out to give us the okay to move in, which basically means spending the night. In our state, most of the dwelling regulations are driven by a space where a person sleeps. If you spend only non-sleeping time in the space, you're generally exempt. At times this has made me want to build a tipi for "sleeping" and a really awesome "garage" to "spend our days". Instead, we've built a very modest house, and once time and money allows, I plan to construct a sizable "shop" in which to house my tools, our garden equipment, storage, place for canning and butchering, and a rec space to house a ping pong table and other things to entertain crowds, or just our family. By doing it this way, the square footage normally dedicated to these things in a traditional house (and taxed accordingly) is now considered agricultural space, and therefore much better on the tax bill and, as indicated above, subject to more relaxed code requirements.
In the coming weeks, once I'm no longer spending every non-job minute working on the house, I hope to offer some reflections on this process and why we are doing what we are doing, to hopefully answer the almost as innumerable questions of "how are you going to fit that many kids in such a small house" or "how are you going to live without running water?" I'll also try to put together a detailed cost list, so you can see what this project cost us.
Even on a relatively modest project such as this, without running water or a central ventilation system, there are innumerable codes and rules that must be followed (a/k/a hoops to jump through). Overall this has not been a big hurdle, but now as I prepare for the final inspection, I'm trying to make sure I have everything ready to go. Deck railings have to be finished and there are very rigid rules on spacing between railing spindles, etc. The interior stairs are now basically done, with the exception of a few more coats of sealer and probably a hand rail at some point. There are also a few odds and ends trim pieces to put up.
The one exterior deck is now complete and, once I complete the spindles for the other side, I should be ready to have the inspector come out to give us the okay to move in, which basically means spending the night. In our state, most of the dwelling regulations are driven by a space where a person sleeps. If you spend only non-sleeping time in the space, you're generally exempt. At times this has made me want to build a tipi for "sleeping" and a really awesome "garage" to "spend our days". Instead, we've built a very modest house, and once time and money allows, I plan to construct a sizable "shop" in which to house my tools, our garden equipment, storage, place for canning and butchering, and a rec space to house a ping pong table and other things to entertain crowds, or just our family. By doing it this way, the square footage normally dedicated to these things in a traditional house (and taxed accordingly) is now considered agricultural space, and therefore much better on the tax bill and, as indicated above, subject to more relaxed code requirements.
In the coming weeks, once I'm no longer spending every non-job minute working on the house, I hope to offer some reflections on this process and why we are doing what we are doing, to hopefully answer the almost as innumerable questions of "how are you going to fit that many kids in such a small house" or "how are you going to live without running water?" I'll also try to put together a detailed cost list, so you can see what this project cost us.
![]() |
| Kids' bedroom |
![]() |
| Dining Room |
![]() |
| Living Room |
![]() |
| Heavy Timber stairs with railings |
![]() |
| Completed Deck |
Saturday, February 2, 2013
Finishing touches
The project is finally nearing the end--well, end inasmuch as we'll be able to move in soon. It's not soon to end to the extent that we won't have running water at first, as I didn't have the money to install the septic and plumbing before winter. There will still be much to do over the coming year but, wonderfully, it will be done by walking out my own back door.
For a variety of reasons, I decided to hire the builders to come back and do the trim. Once again, this was a regret-free decision, as these guys do exceptional work. I also purchased pine from them for trim, at a price a little cheaper than Menards, and made from the same species of wood as the logs. Because the logs were out in the elements and in the sun for much of the year, they are more yellow/orange than they were when new, so the trim is a little lighter than the logs, but with time, they'll look the same.
After considering the various options about what type of sealer to use inside the cabin (and whether to use sealer), we went with a water-based Minwax Polychrylic. It goes on very well and we've simply sealed all the wood with two coats. I haven't stained anything--just sealed it. Having the sealer will keep the wood (trim and logs) safer from stains and little dirty hands, will minimize the degree to which the logs turn orange with age, and should help keep them more stable. Logs, like wood floors, change size over the course of the year, depending on the humidity. In the summer, the air is generally more humid, so wood expands. In the winter, as the air dries out, it shrinks a bit, which is why you may see joints in your hardwood floors in the winter that are absent in the summer. It's also why doors on old houses may swing freely part of the year, and stick the other part of the year.
The logs have been sealed and most of the trim is up. I'm waiting for the trim to get finished next week so I can sand the upstairs floors lightly and seal with the final coat. Then it will be time to start moving furniture upstairs. In particular, I need to get our queen sized box spring upstairs before the railing goes up; otherwise, it likely won't fit.
In one week we should be done with all the trim and the ceiling sealed with poly. By next weekend, we should be enjoying the fire from the comfort of our own furniture.
For a variety of reasons, I decided to hire the builders to come back and do the trim. Once again, this was a regret-free decision, as these guys do exceptional work. I also purchased pine from them for trim, at a price a little cheaper than Menards, and made from the same species of wood as the logs. Because the logs were out in the elements and in the sun for much of the year, they are more yellow/orange than they were when new, so the trim is a little lighter than the logs, but with time, they'll look the same.
After considering the various options about what type of sealer to use inside the cabin (and whether to use sealer), we went with a water-based Minwax Polychrylic. It goes on very well and we've simply sealed all the wood with two coats. I haven't stained anything--just sealed it. Having the sealer will keep the wood (trim and logs) safer from stains and little dirty hands, will minimize the degree to which the logs turn orange with age, and should help keep them more stable. Logs, like wood floors, change size over the course of the year, depending on the humidity. In the summer, the air is generally more humid, so wood expands. In the winter, as the air dries out, it shrinks a bit, which is why you may see joints in your hardwood floors in the winter that are absent in the summer. It's also why doors on old houses may swing freely part of the year, and stick the other part of the year.
The logs have been sealed and most of the trim is up. I'm waiting for the trim to get finished next week so I can sand the upstairs floors lightly and seal with the final coat. Then it will be time to start moving furniture upstairs. In particular, I need to get our queen sized box spring upstairs before the railing goes up; otherwise, it likely won't fit.
In one week we should be done with all the trim and the ceiling sealed with poly. By next weekend, we should be enjoying the fire from the comfort of our own furniture.
![]() |
| Trim detail and car siding around chimney |
![]() |
| Pine doors and trim |
![]() |
| Sealing and drying trim |
Sunday, January 20, 2013
Paint and Flooring
This past week or two has seen a lot of progress on the finish work inside the cabin. Once the drywall joints had been taped and mudded, I sanded lightly and wiped the walls down to try and remove any dust. Most walls these days are textured in some way, but I elected to go with smooth surface, for two main reasons. First, I didn't want the extra time and cost associated with texturing. Second, smooth walls are generally easier to patch than textured walls if you get holes in them, as you don't have to try to find a way to match whatever texture was used at the time of construction. The drawback to smooth surface is you have to be more precise in your plastering/sanding, and you have to live with the inevitable little defects you won't see until painting is done.
We went with a very light yellow color for paint and are pretty happy with how it looks. We wanted a color that was fairly light, but didn't want an off white or gray color. We'll see how it holds up to traffic and wood heat.
One other project I did once the walls were plastered was to put the box around the chimney. I have to keep at least a 2 inch clearance from the sides of my chimney (clearances are determined by manufacturer, and because we went with a triple wall chimney, the clearances were quite low), so measured and build the pieces and screwed them in to place. Once the paint was done, I began adding car siding to the exterior. I decided to go with car siding over sheetrock because 1. I was sick of hanging sheetrock and plastering, 2. I thought the wall could use a little more wood, and 3. I thought wood would be more durable than sheetrock with the kids.
Once the painting was done, I rented a commercial floor sander after work one day and sanded until well in to the morning, starting with 20 grit and moving up to 100 grit. The floor for the loft (and what is the ceiling from the first floor) is spruce, as it is a more dense grain and harder than other pines. The flooring is 1 1/2 (closer to 1 1/4" after milling) tongue and groove and is not designed to ever be entirely smooth like most hardwood floors. My purpose in sanding was to get down all the dirt and dust that had been accumulated during construction, and to try to soften down some of the joints so you don't stub your toes on it. Because I heat with wood, my floors will shrink and move quite a bit in the winter as compared to the summer, when the humidity rises again. It's important to understand the strengths and limitations of your material.
I also had to decide what to do with floors for the main level, which was simply OSB decking. The original hope was to put down hardwood flooring, such as hickory, but decided not to for a few reasons. First, though I can get the flooring for $2.00 to $2.50 /sq. ft. from the local Amish, there are still quite a few additional costs to get the sander (probably a $150-200 investment for the size of my floors), the sealer (another $150-200), and the time associated with getting the floor acclimated, sanded, and sealed. Once I knew I wasn't going to put in the hardwoods right away, I had to decide whether to try and paint the floors for now, or put down something like laminate. I went with laminate for 3 main reasons. First, I quickly realized that the subfloor was not going to work for painting, as it pieces would flake too much from having gotten rained on in the construction phase. Second, I was concerned the appraiser would raise a fuss when it came time for the final bank appraisal to convert from a building loan to the a traditional mortgage. Third, I found the laminate I liked for about $1.00/ft. square, and it goes down quickly and looks very nice when it's done.
This week we'll start putting up the trim and finishing the floors. I'm hoping to get all the inside work done so I can get the final inspection and then, once we start to move in, I can finish some of the outside work, such as deck spindles and insulation underneath the cabin.
We went with a very light yellow color for paint and are pretty happy with how it looks. We wanted a color that was fairly light, but didn't want an off white or gray color. We'll see how it holds up to traffic and wood heat.
One other project I did once the walls were plastered was to put the box around the chimney. I have to keep at least a 2 inch clearance from the sides of my chimney (clearances are determined by manufacturer, and because we went with a triple wall chimney, the clearances were quite low), so measured and build the pieces and screwed them in to place. Once the paint was done, I began adding car siding to the exterior. I decided to go with car siding over sheetrock because 1. I was sick of hanging sheetrock and plastering, 2. I thought the wall could use a little more wood, and 3. I thought wood would be more durable than sheetrock with the kids.
Once the painting was done, I rented a commercial floor sander after work one day and sanded until well in to the morning, starting with 20 grit and moving up to 100 grit. The floor for the loft (and what is the ceiling from the first floor) is spruce, as it is a more dense grain and harder than other pines. The flooring is 1 1/2 (closer to 1 1/4" after milling) tongue and groove and is not designed to ever be entirely smooth like most hardwood floors. My purpose in sanding was to get down all the dirt and dust that had been accumulated during construction, and to try to soften down some of the joints so you don't stub your toes on it. Because I heat with wood, my floors will shrink and move quite a bit in the winter as compared to the summer, when the humidity rises again. It's important to understand the strengths and limitations of your material.
I also had to decide what to do with floors for the main level, which was simply OSB decking. The original hope was to put down hardwood flooring, such as hickory, but decided not to for a few reasons. First, though I can get the flooring for $2.00 to $2.50 /sq. ft. from the local Amish, there are still quite a few additional costs to get the sander (probably a $150-200 investment for the size of my floors), the sealer (another $150-200), and the time associated with getting the floor acclimated, sanded, and sealed. Once I knew I wasn't going to put in the hardwoods right away, I had to decide whether to try and paint the floors for now, or put down something like laminate. I went with laminate for 3 main reasons. First, I quickly realized that the subfloor was not going to work for painting, as it pieces would flake too much from having gotten rained on in the construction phase. Second, I was concerned the appraiser would raise a fuss when it came time for the final bank appraisal to convert from a building loan to the a traditional mortgage. Third, I found the laminate I liked for about $1.00/ft. square, and it goes down quickly and looks very nice when it's done.
This week we'll start putting up the trim and finishing the floors. I'm hoping to get all the inside work done so I can get the final inspection and then, once we start to move in, I can finish some of the outside work, such as deck spindles and insulation underneath the cabin.
![]() |
| Electric Panel |
![]() |
| Rented floor sander |
![]() |
| Finished floors |
![]() |
| Framing around chimney |
![]() |
| Card siding started around chimney |
![]() |
| Lower Level before flooring |
![]() |
| Laminate flooring on first floor |
![]() |
| East side deck and ramp |
![]() |
| West side deck and ramp |
Subscribe to:
Posts (Atom)