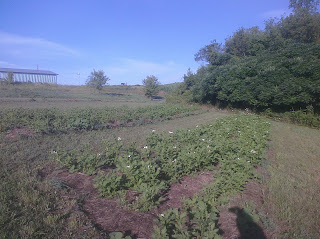
If you boil it right down to it, there are three key aspects to a successful garden: 1. make sure plants get an adequate amount of moisture, 2. make sure weeds are kept under control; and 3. make sure plants get adequate nutrition. I suppose a fourth could be--keep your plants from getting gobbled up by bugs and critters, but for now, I want to address these three features.
Water: like much of the country, we here in WI are experiencing above-average temps and below average rainfall, with no immediate relief in sight. We've had an extended stretch of high temps, warm winds, and little to no cool down. This takes a heavy toll on plants. As a result, we've had to water some of our plants.
We don't water everything, particularly the potatoes and sweet corn. The potatoes are mulched heavily, and so despite the heat and lack of rain, the soil is still nicely moist under the potatoes. We also don't water the sweet corn, since corn generally can put down deep roots and we have a heavy clay soil, so it's generally able to go down and get the moisture, wherever it's at. We also don't generally water the asparagus, as it tends to have deep roots, but we did give that a shot this week.
The balance of the things in our garden tend to need moisture, some more than others. Our strawberries, which are new transplants this spring and are surrounded by black plastic, get watered more than anything else. The tomatoes, starting to bloom and put out fruit, also require a fair amount of water. The melons (cantaloupe and watermelon) really need water this time of year as they are putting out heavy fruit. Our fruit trees and grape vines, planted last year, got watered this week, but they've probably put down good roots and we haven't watered them before now this year.
There are a few simple tips to keep in mind to make the best use of water. Mulch is an obvious example. Another is for some of your plants, such as melons, pumpkins, and squash, is to plant them slightly recessed so that when you water them, the moisture all stays right where the plants are and doesn't run away.
For others plants, like tomatoes, we tend to create two parallel ridges along both sides of a row, by hoeing the loose soil between the rows. This creates a small channel the length of the row and when we add water, it stays rights over the roots for the tomatoes.
 |
| Tomatoes with water "ridges" |
Weeds: Ever since being a kid, I've hated weeding, so look for as many ways as possible to avoid weeding. We use mulch and plastic as the primary ways of controlling weeds. For the crops we can't mulch or use plastic, we have to weed with a tiller and/or with a hoe or by hand. One thing to keep in mind when determining whether to use mulch or a plastic is to determine whether the plants like heat or not. For our plants that like heat (melons being the most obvious example), plastic is the best choice because, not only does it keep the weeds in control, it further sucks up the heat from the sun and gives the plants an extra temperature boost to keep them moving. Here is a side by side comparison between a cantaloup growing on plastic and one growing on hay mulch. They were planted the same time and you can see the difference.
 |
| Two cantaloup plants, one on plastic and one on mulch |
Nutrition: Books have been written on all the different aspects of soil preparation and plant nutrition. From PH to mineral levels, you can drive yourself crazy trying to overanalyze soil nutrition. We try to keep things simple. For example, not all plants like nitrogen, but we tend to use good composted manure where possible. For example, potatoes seem to do real well in an area freshly turned over from sod. I believe it has to do with phosphorus, but I can't really tell you the technical reason. Regardless of why, I try to plant potatoes to a new area of the garden as much as possible, and try to keep from using them in the same spot more than once every 3 years.
I don't have a lot of actual compost built up yet, so we rely primarily on composted manure for soil nutrition. And rather than broadcasting the manure, we try to focus it right on the site of planting. For plants like strawberries and tomatoes, when we plant we'll try to add a scoop of composted manure right around the plant. When we plant "hill" crops, like melons and pumpkins/squash, we will dig out a 3-4 foot diameter area and turn in some composted manure, and then plan directly in to that area. Here's a side by side comparison of two hills of pumpkins, planted at the same time. Can you tell which one had the manure added?
 |
| Two pumpkins, one with composted manure added and one without. |
Pest control: though I didn't list this as an official area of garden care, pest control is a real concern for most gardeners. For us, bugs have not been a major problem. I attribute this in large part to the fact that our garden is relatively new, as it had been hay fields for quite some time, and that we rotate our crops a lot. I like to leave at least 2-3 years of space between planting the same crops in the same part of the garden. Potato bugs are a major problem for almost anybody that grows potatoes. We've managed to minimize or eliminate the problem in two main ways without resorting to harmful sprays and dusts. First, we primarily plant "
King Harry" potatoes, which have shown themselves to be resistant to the potato bug. Second, we tend to plant our potatoes a little later than most people (May-June here in WI). While it may be exciting to see large potato plants early in the spring, potato bugs feel the same way. We have found that, by planting our potatoes a little later than most, by the time our potatoes come up and start bearing heavy foliage, the bug season is almost over. Hence, even our Russets seem to avoid a lot of the potato bug problems.
One problem we do have, however, is wild animals. Rabbits, if you have them, will eat strawberries, salad greens, peas, beans, and most types of cabbage/broccoli. Deer will eat many of the same things, including sweet corn (both the plant and the ear). Raccoon will ravage a sweet corn patch right when the ears are ready to pick. Deer have been our main problem thus far, and I expect the raccoon to show up when the corn is right. Because of this, we decided it was time to try to fence the deer out.
Deer can jump a large fence, so you have to approach the problem in the right way. One option is to put a large, woven fire fence around your whole garden. This can be expensive and time consuming. Another option is to try to "educate" your deer with an electric fence. For us, this means we put a two strand electric fence around the part of our garden having the things deer like to eat. The top strand goes about 3-4 feet of the ground. The deer will approach the fence slowly and, hopefully, give the fence a curious sniff or lick and get zapped. This will hopefully let them know they want nothing to do with the fence. The bottom strand is about 6-8 inches off the ground, and is for the coon. Like the deer, the hope is that the coon will approach the new fence cautiously at first, take a lick, and also realize they want nothing to do with the fence, and won't try to climb through or jump over.
Because deer and coon are nocturnal, it's important to keep the fence visible. We have found that barbed wire is easier for them to see than smooth wire. For the deer, we tie strips of rags all around the top wire, and further periodically add a few drops of cheap aftershave (you can get it at the dollar store) to each rag. Deer have a keen sense of smell, and generally hate the smell of humans. This provides a further warning to deer, and while it may not keep them away entirely, it helps to make sure they approach the fence more slowly and remember this is that fence that "zapped" them the last time. It's important to make sure the deer can see your fence, as they can and will snap electric fence if they run through it.
 |
| Electric fence |
 |
| Electric fence with rags along potatoes |
 |
| Adding aftershave to rags |
I have a couple videos showing this as well, but I have to edit them to get them to fit, so for now, I'll just add a few more pics of the garden.
 |
| Sugar Baby watermelon |
 |
| Cucumbers on right and pumpkins on left |
 |
| Electric fence from terrace. |
 |
| You can see our garden is divided in to beds with grass paths in between |
 |
| Grape |
 |
| Trellis made from corn crib rings |


